

Building Formers
After a tutorial with Rob, we decided it could be a good idea to consider the use of formers. Inspired by the Wendy Lawrence former that was already in the studio, I went off and built my own.
Through using formers, it could allow me to manipulate slabs, add texture onto slabs, add more fluidity to my work and piece together slabs on the former allowing for larger scaled pieces. The curved form also allows me to slice and manipulate, adding a pre-determined sense of movement to the piece as it’s being built.
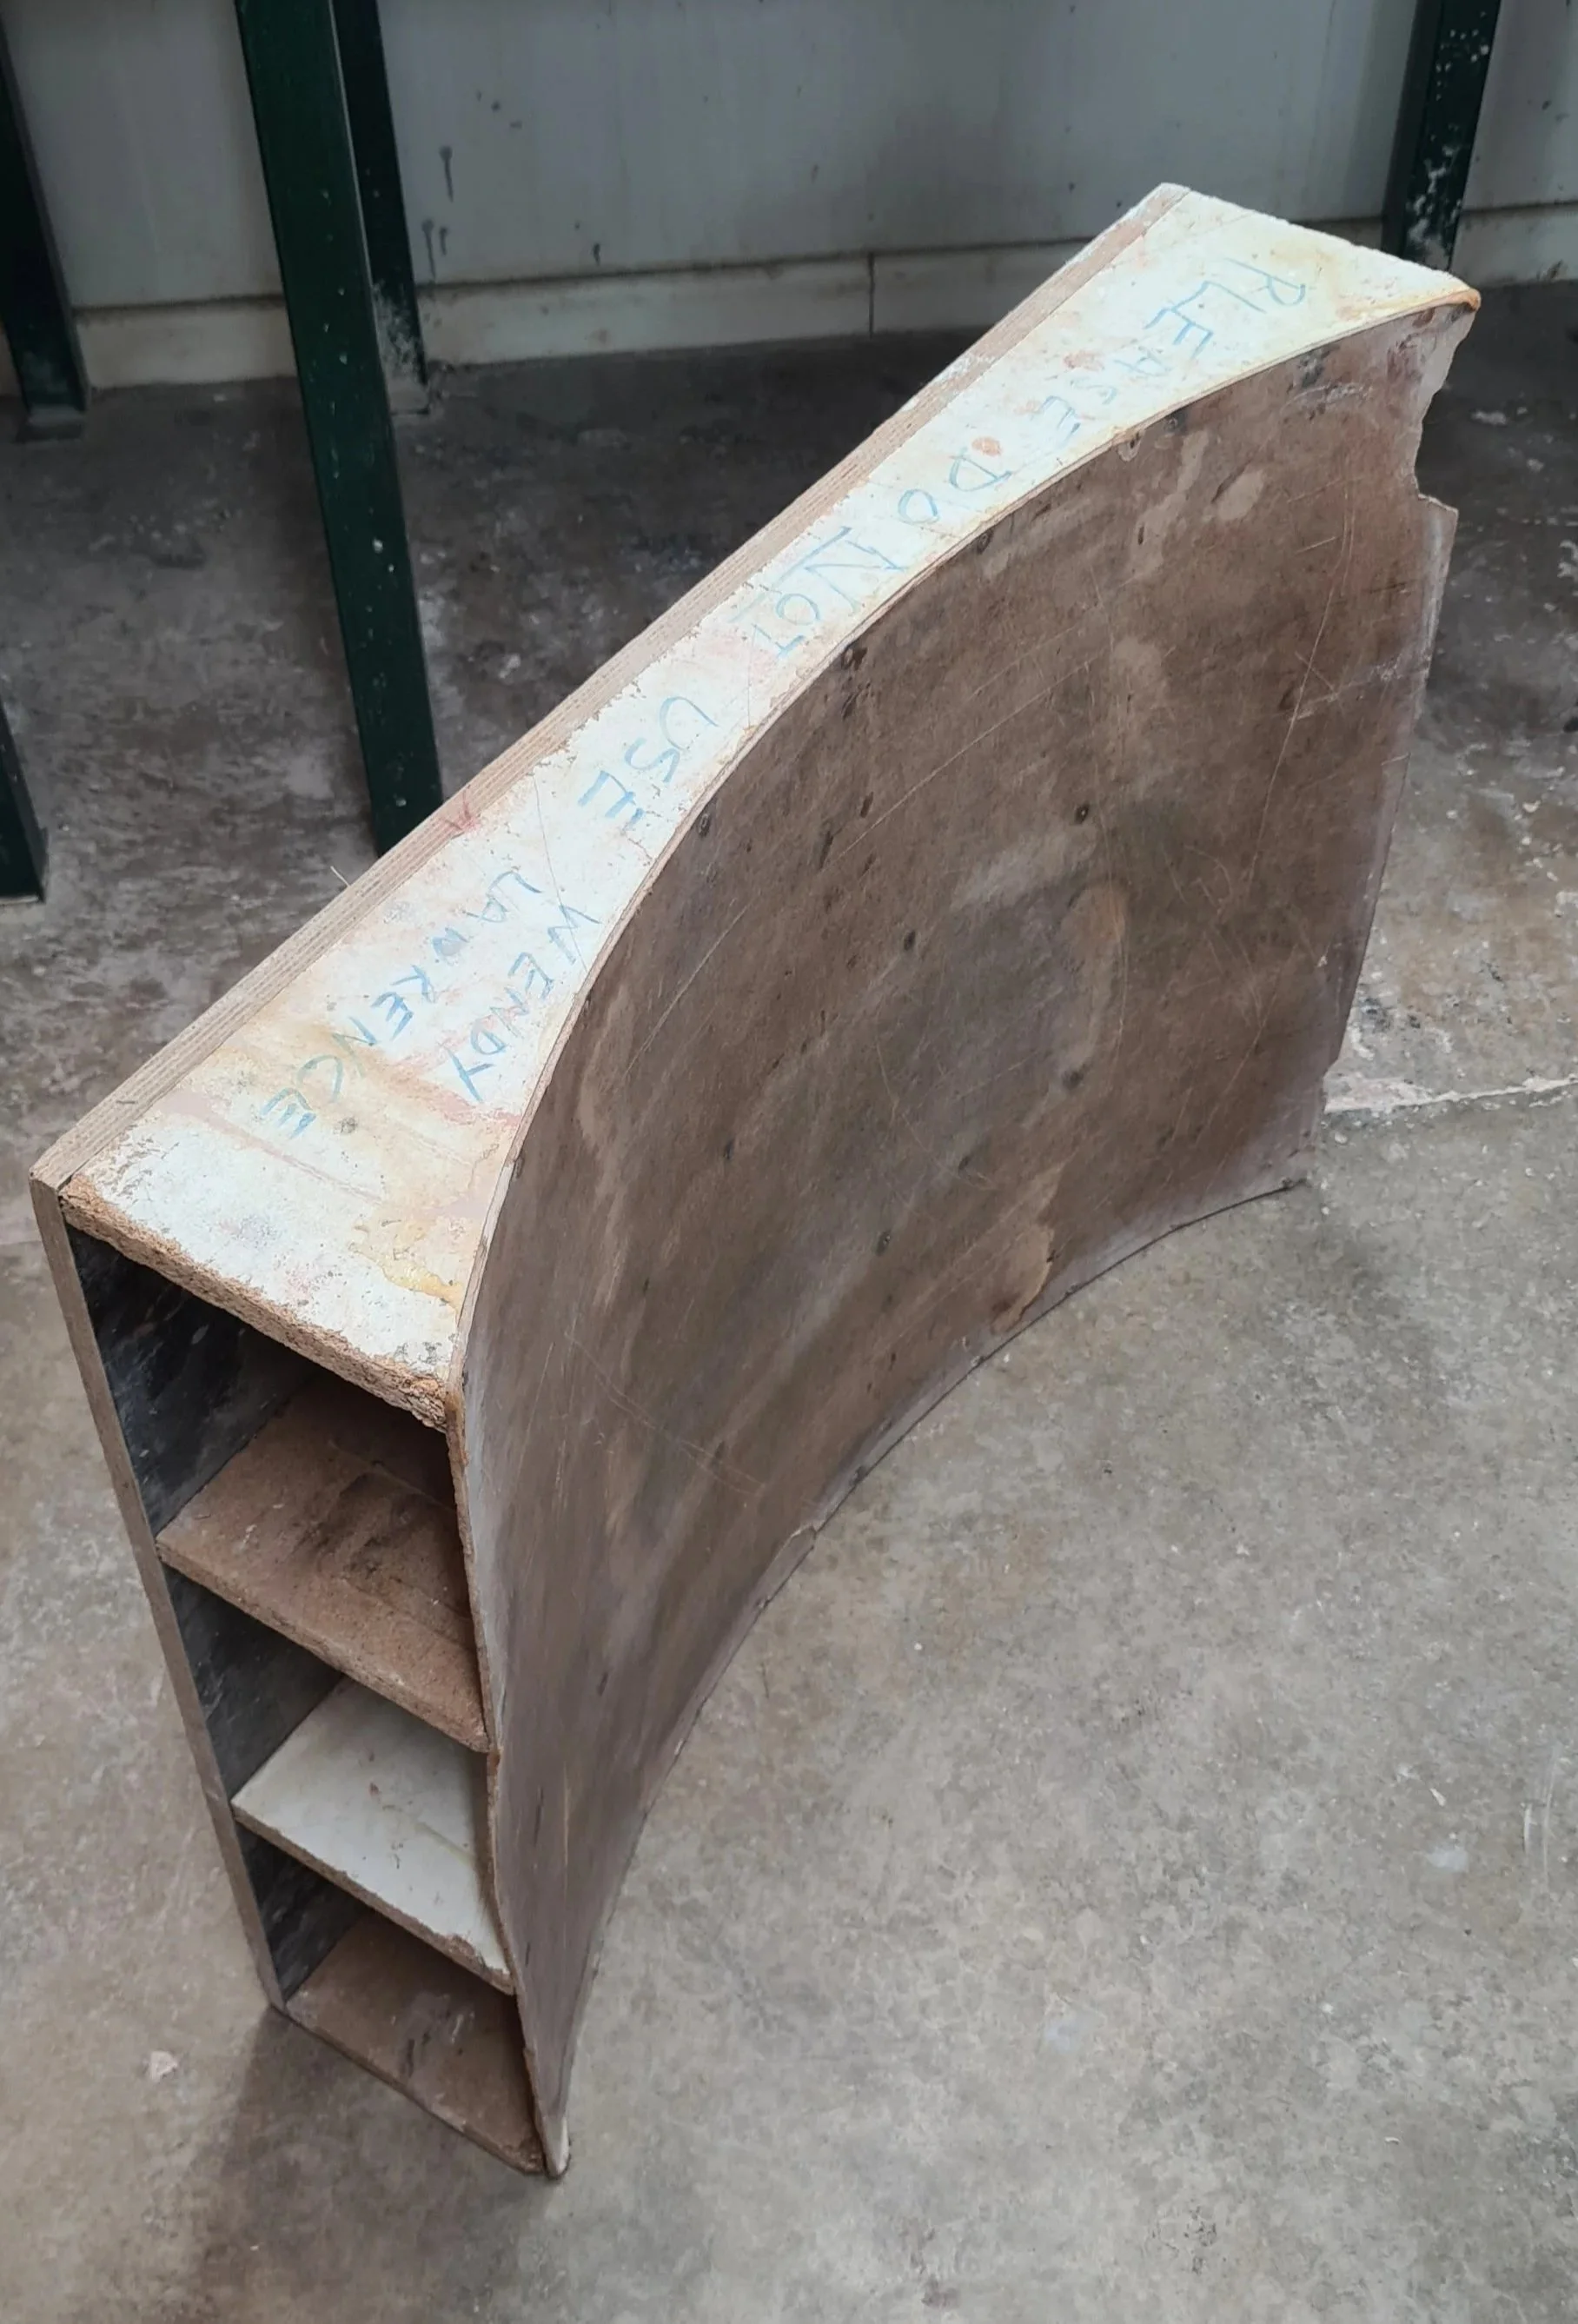
Wendy Lawrences Former
This was Wendy Lawrences former in the studio. I essentially made an exact replica.
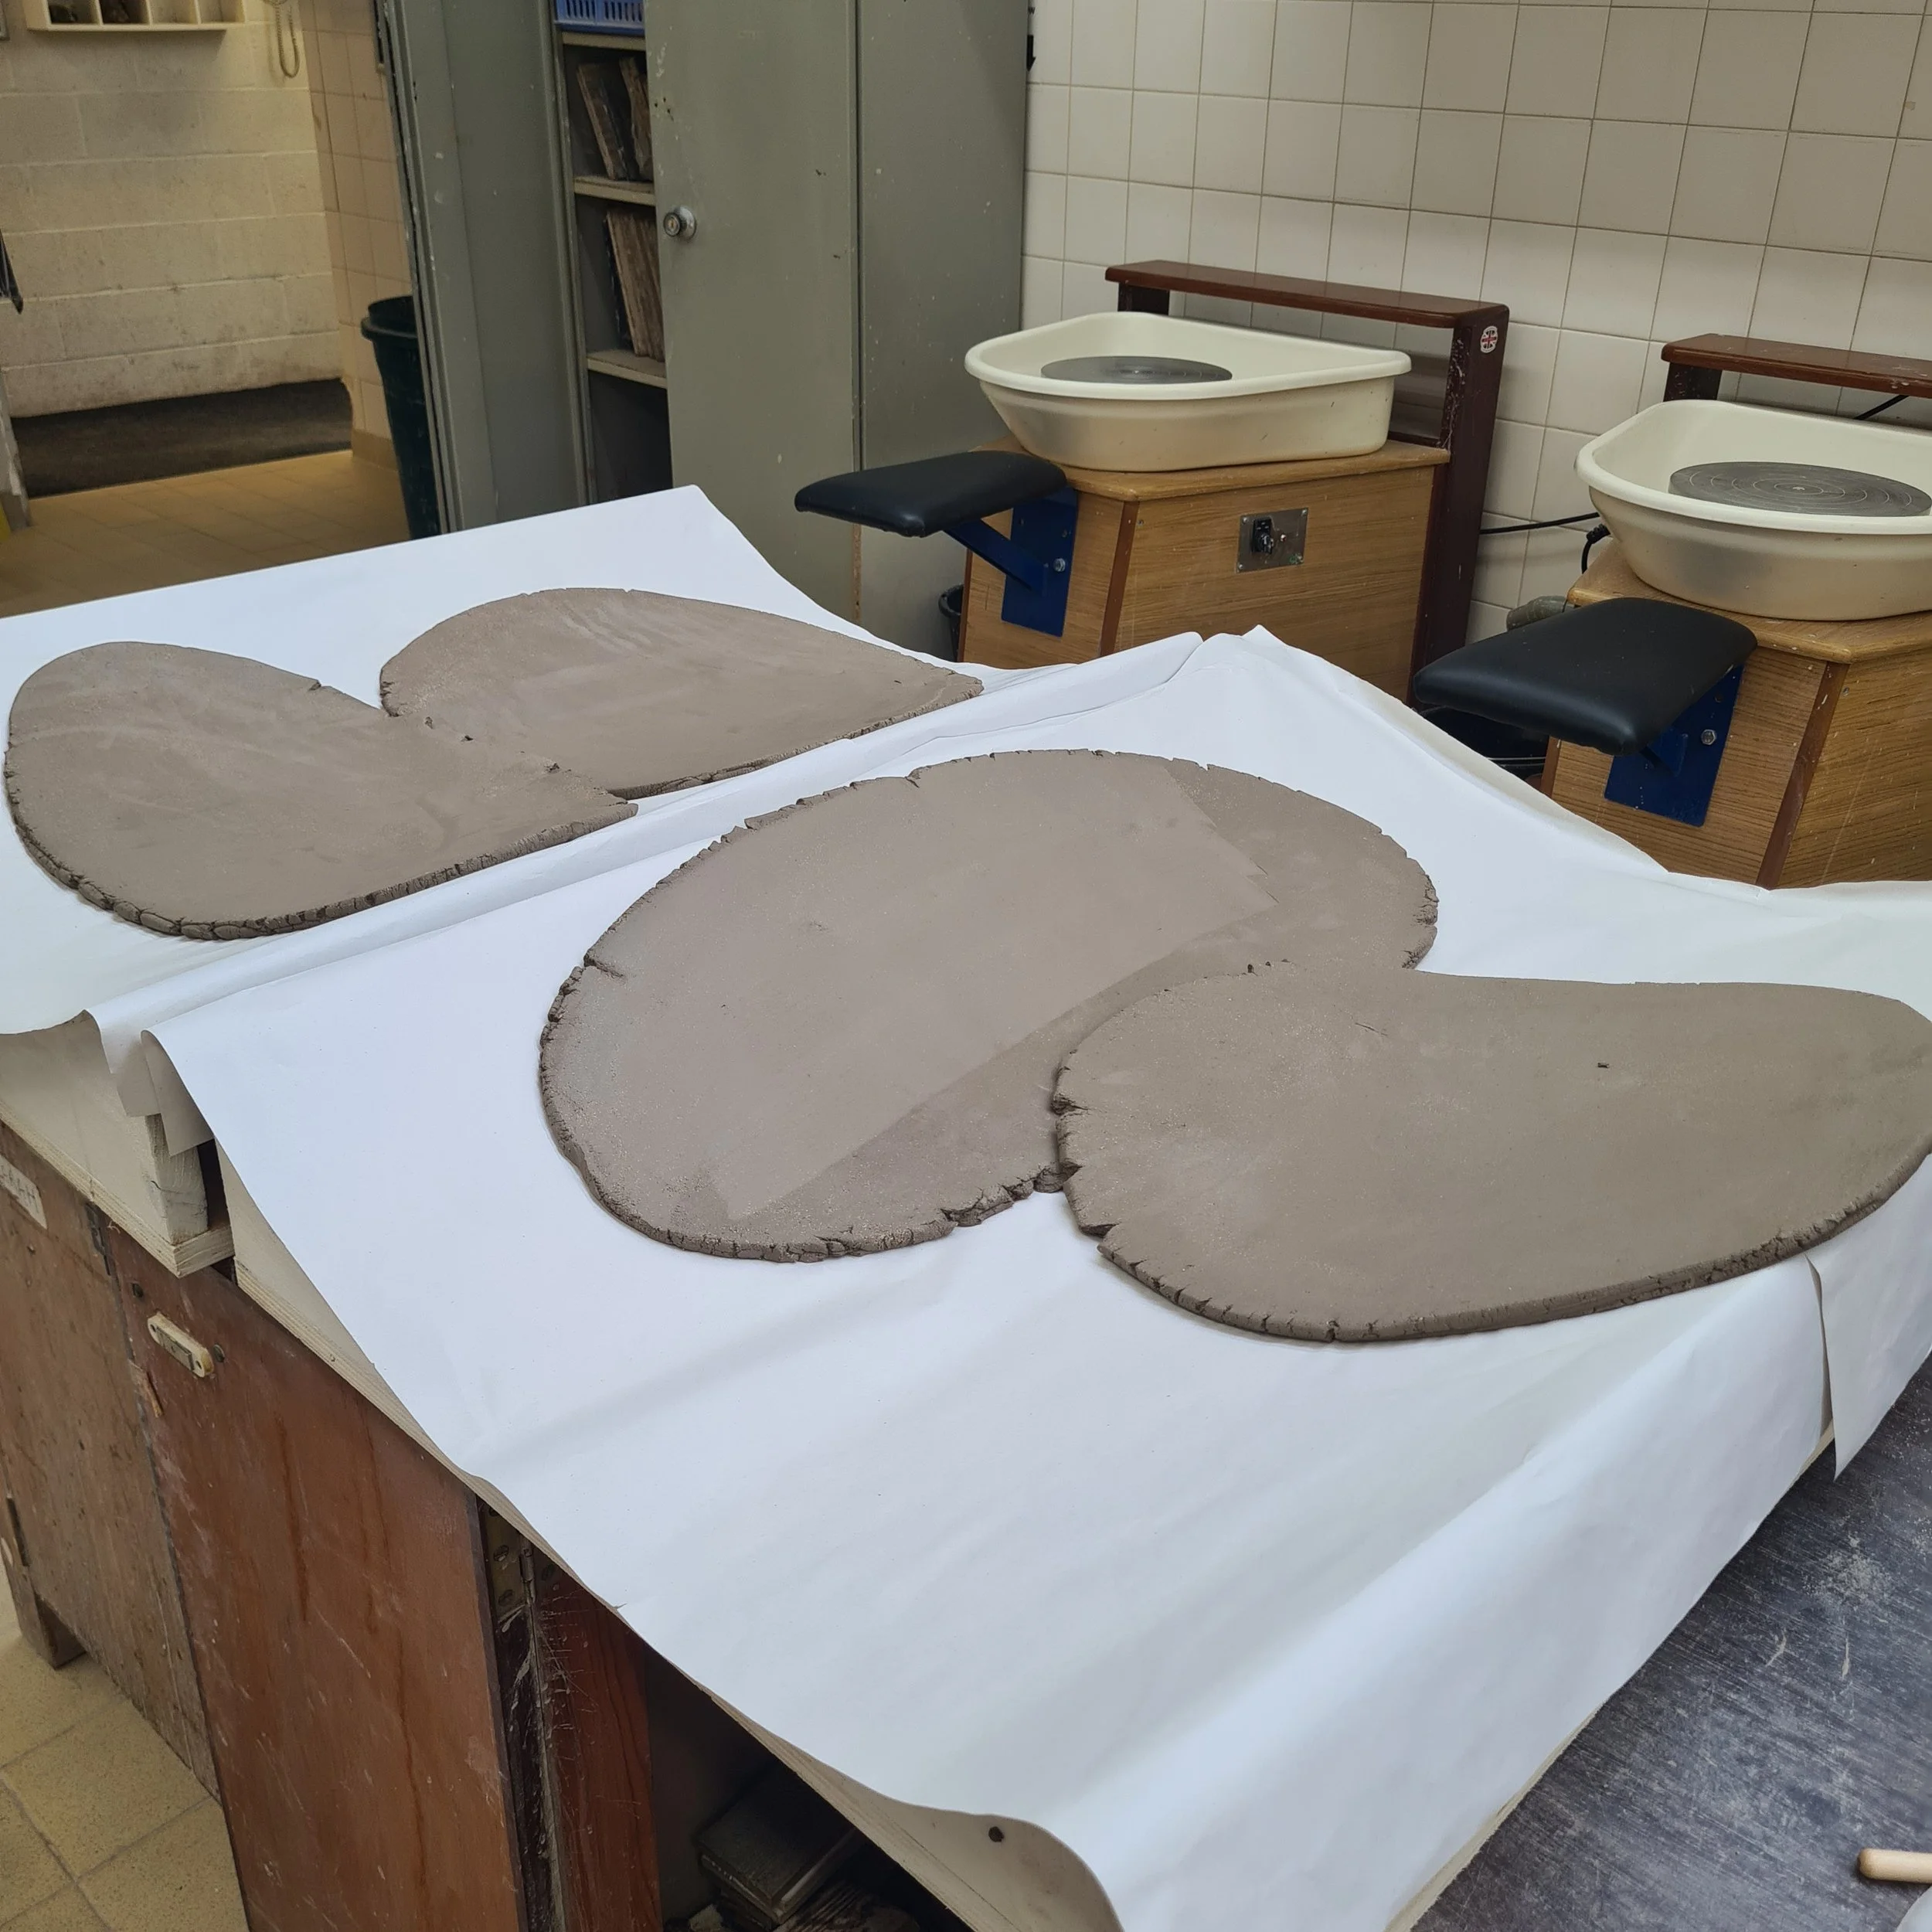
Formers in use
I put paper on the formers to prevent the clay from sticking. I then rolled out some slabs in some stoneware clay- Here I connected them and let them dry overnight to become leather hard.
This was the making of my first large scale sculpture- Check out my blog post about creating my first large scale piece for more info!
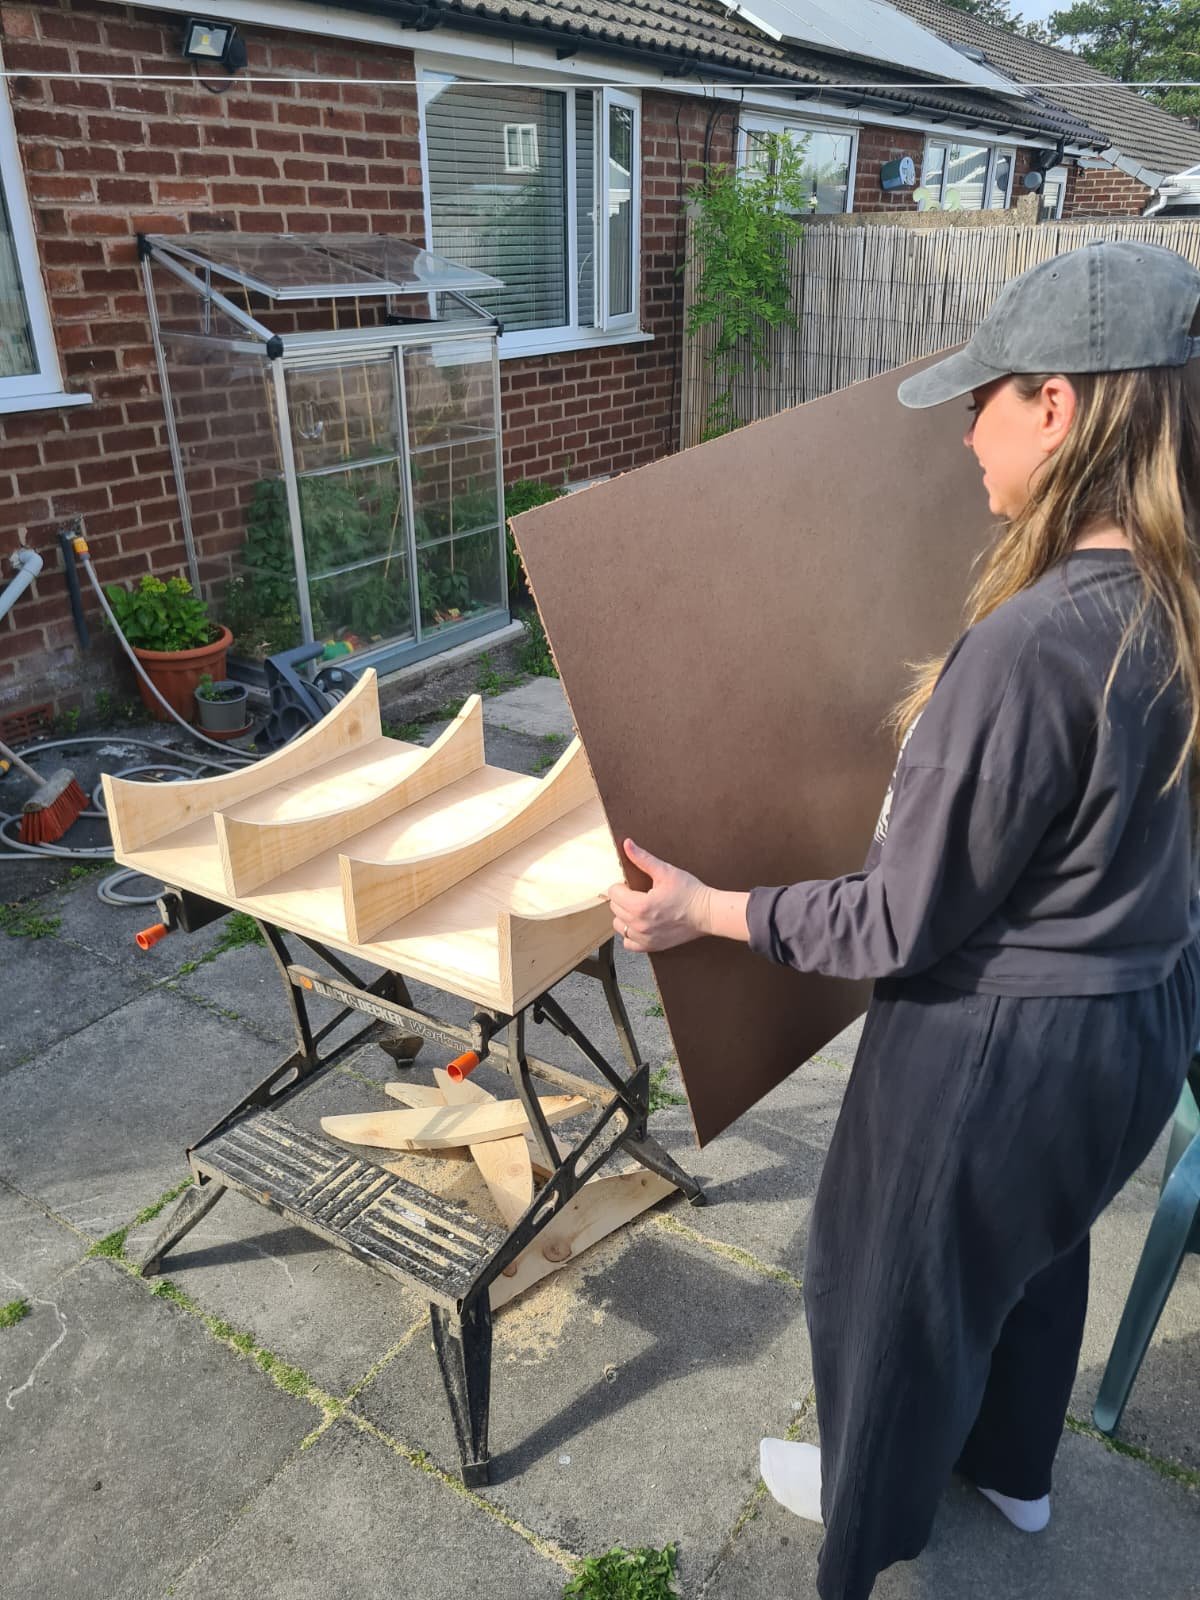
Creating the former
I used plywood for the base and some spare wood for the curved structural beams. I then used hardboard for the top as it has flexible properties.
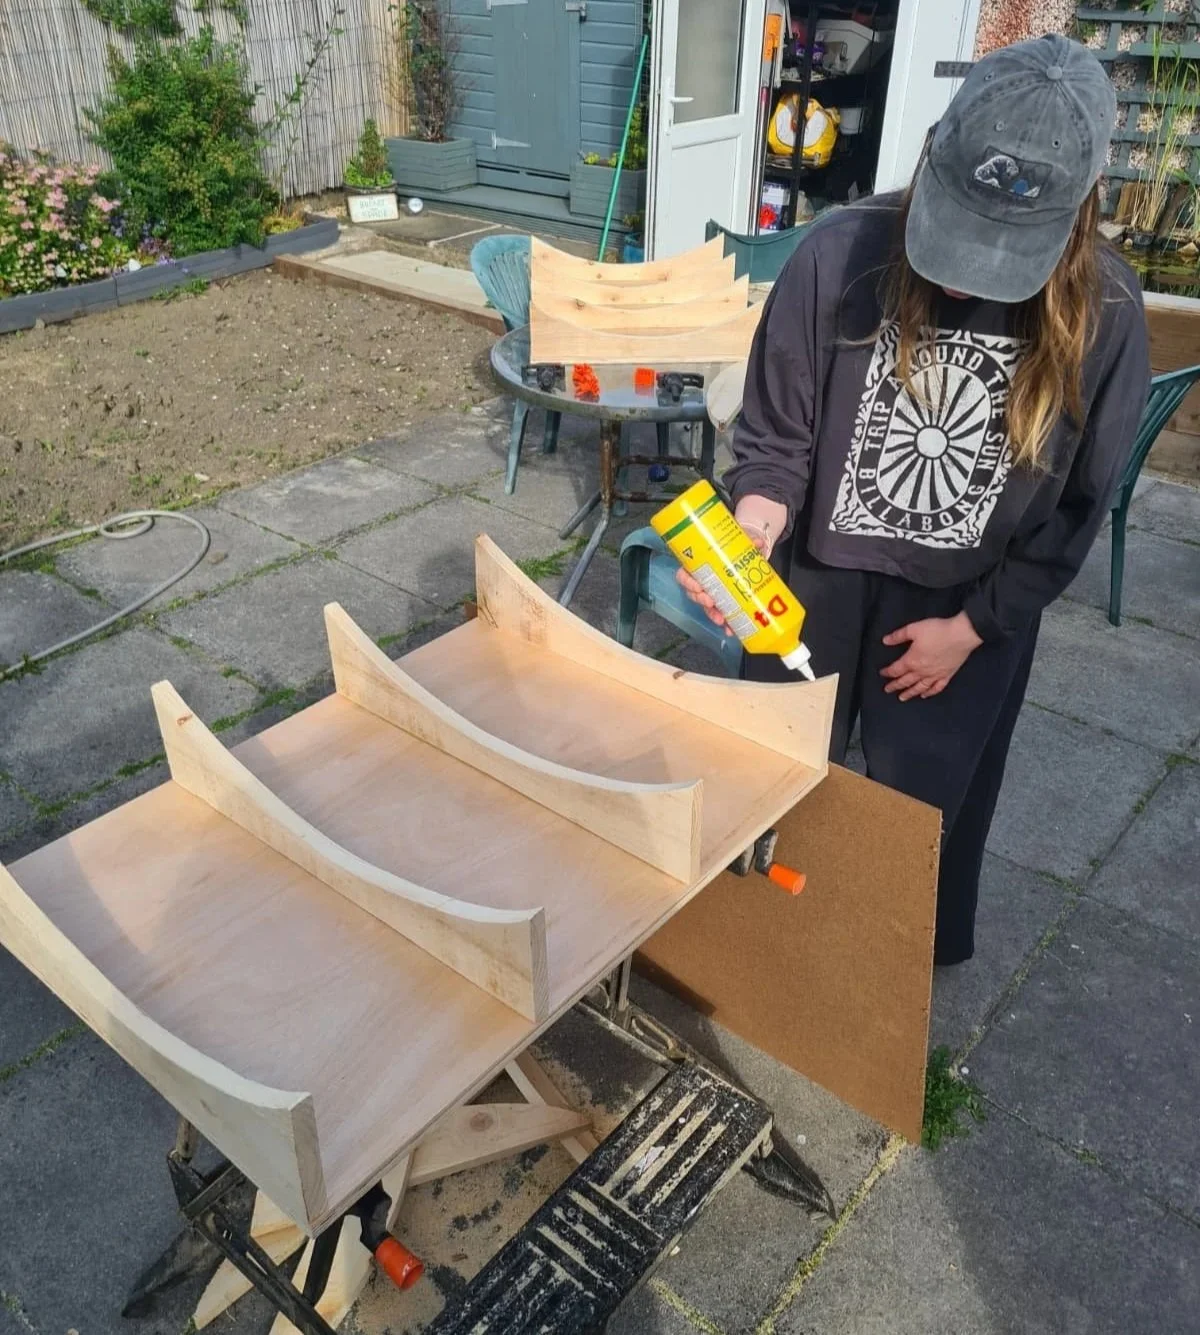
Piecing it together
I used wood glue to ensure it would stay secure once the nails were in. I then nailed in the hardboard into the curved beams, trying to sink them below the surface as much as I could. I screwed the beams into the base prior. I made two formers in total.
Reflection
Upon using the formers, I feel like it’s added a valuable learning experience. It’s allowed me to create forms I couldn’t typically establish without the use of a former. It’s also allowed me to consider using plaster formers and other supportive structures to enhance my making ability. I am still yet to decide if this particular shape of former is useful for my practice, but i’ll definitely keep using it for larger scale pieces to explore the possibilities.