

Coiling & Pinch Pots
Our next project assigned to us consisted of making coil pots & pinch pots.
We had to make 3 identical pinch pots, no more than 10cm in height or width. This meant we worked with a palm full of clay and worked it gradually over the course of a couple hours to create a pinch pot design. As the clay got harder over the few hours, I managed to incorporate more detail and finer touches to the design. I ended up thinning out the top of the pot and added a organic flow to the rim, almost resembling a flower or petal. I then added a foot-rim or base to the pot to add more structure and balance to the three. I’m not sure what was intended use was with the end product but a form of vessel to hold liquids or things could work! Either way- I tried to make the three as identical as possible.
Using the time in-between the pinch pots, we got to work on our coil pot. We had to create two vessels using this method. I thought it was actually quite challenging at first. I made my coils too thin, so when I came to build, the structure collapsed and I struggled to blend each round of the coils into each other due to the thinness & fragility of the structure. We came to a conclusion that I should scrap that one (However, it was a great learning experience) and I started over. This time, I made my coils much thicker and I managed to blend them in to each other a lot more easily. It was also quicker to build!
We had to build as high as we could go without loosing the structural integrity. I built to around 25cm high. I felt any higher, I could risk it going lobsided. After smoothing out the outside, I tried to trim the rim. I chickened out! Ideally, I should have put it onto the wheel at some speed and then trimmed it but the clay was too wet and I didn't want to risk loosing all my hard work. Instead, I detailed the rim with a coil draped over the top. I liked the outcome & hopefully it survives the kiln!
Lastly, we had to make an upside down pot. This meant coiling from rim to base. This was harder as we had to coil without any platform to stick the first coil too. So, to keep it circular was more of a challange. However, again, using larger coils, it was easier to control and before I knew it, I had created my pot! I smoothed the outside out and added some surface texture and line work similar to my pinch pots. I then had some time, so I decided to create another upside down pot. I kept it the same circumference as the first one so when I was finished I could potentially use them as one piece.
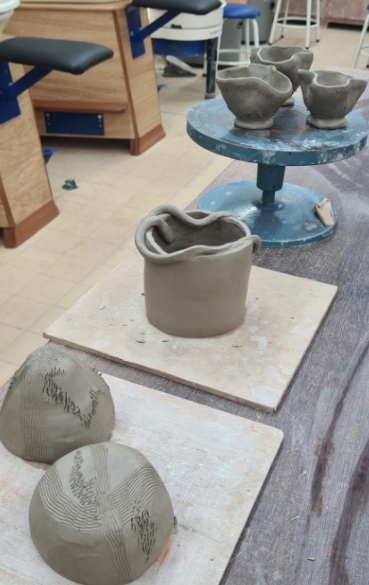
My two upside-down coil pots, coil pot & three pinch pots
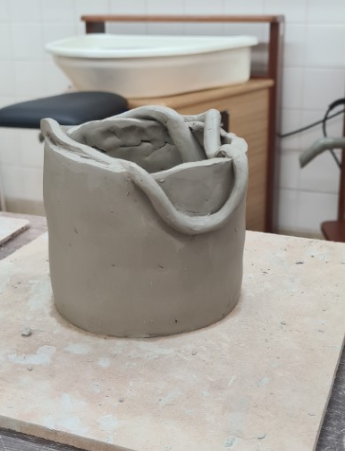
My coil pot with a coil draped over the top.
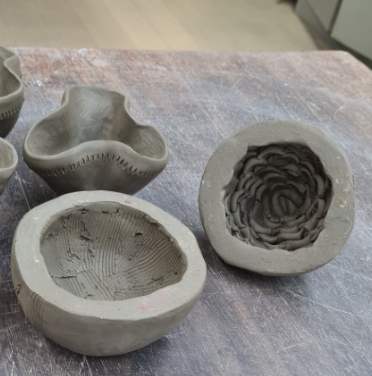
The inside of my upside-down coil pots.

My three pinch pots with an organic style rim