

Slab Building
Even though previously I have taught myself how to slab build, I was definitely lacking knowledge on how to actually slab build successfully. For example, I wasn’t aware there was different ways of joining the slabs…
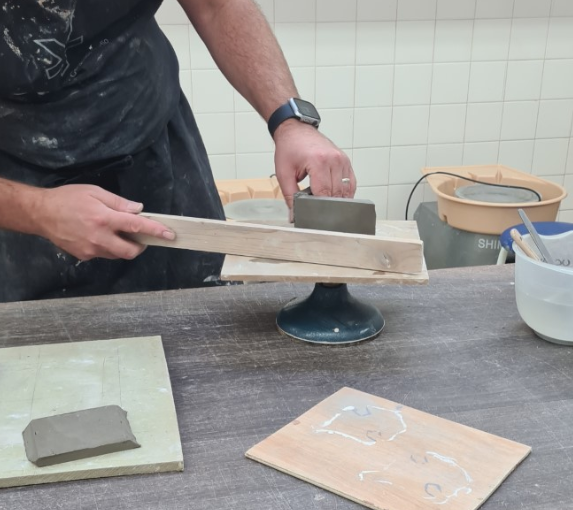
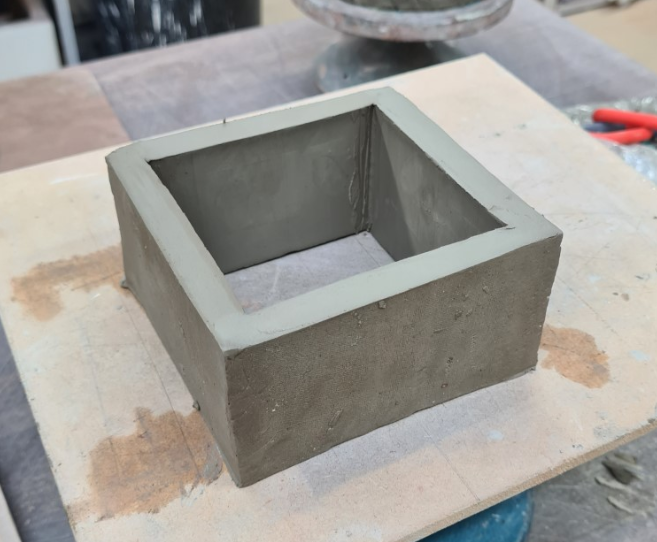
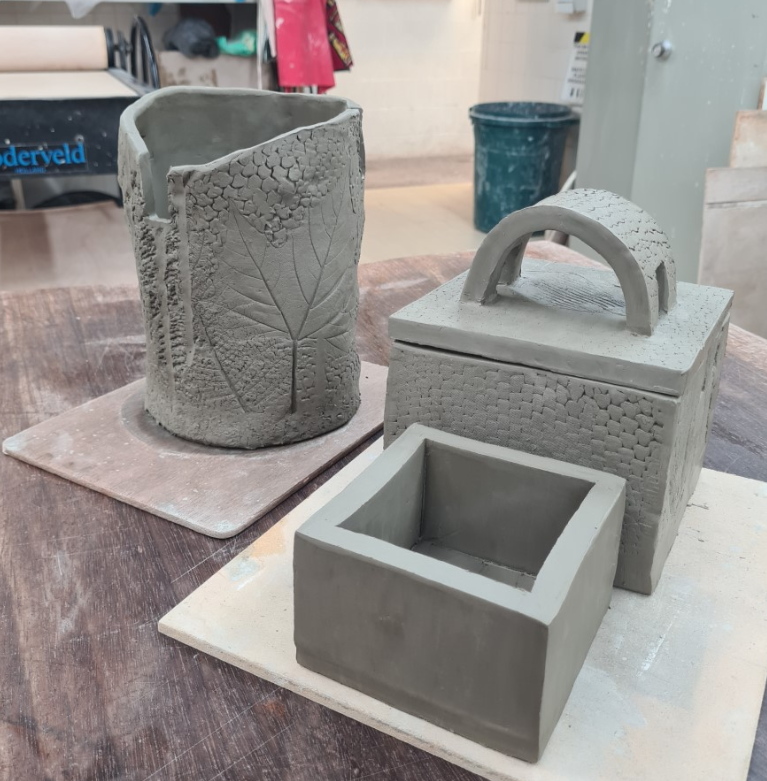
Within this practice, we used the ‘mitre joint’ and ‘butt joint’. We firstly began creating our slabs, in order to create a box with a base. The clay needed to be leather-hard in order create a sharp mitre joint. The most useful method of this practice was learning how to create a 45 degree angle on the slabs. I used a ruler and placed it on the slab leaving a 1cm gap from the edge. I then took my metal kidney and used the ruler to guide my slice. I sliced it on an angle to create this 45 degree slab piece.
Once I had trimmed all my sides to the box on a 45 degree angle, I could then score the edges and apply some water to join the pieces together to form the sides. This is the mitre joint.
I could then create a base for my box and apply it.
The butt joint is less technical. I created a cylinder with applied texture to slab before assembling it. Once I was content with my slab and it’s texture, I then just took my knife and trimmed the edges. I then stood up the slab to form a cylinder and simply connected the two sides by scoring it and adding water. This is actually quite difficult as the clay is still so wet. Trying to form the cylinder was probably the hardest part of this piece. I then finished the cylinder by adding a base.
To create the texture on this piece, I foraged and collected natural items, such as bark, leaves and rocks. I also saved some corrugated cardboard from a delivery box.
Lastly, we were tasked to create a lidded box. Before leaving for the day, I created my slabs and added texture. I applied some harder, textured pieces of clay within my slab and put it through the slab roller to create some embedded texture. I also threw a slab against the side of a tree to pick up on all of it’s intricate textures. I left these slabs to go leather-hard overnight so I could use the mitre joint method the following day.
It surprisingly didn’t take long to assemble my box. I was pleased with the finished design. I then added a handle with some leftover, textured clay and inside the lid, I added some corner pieces so the lid wouldn't fall off.
These are now fired and I will glaze them soon.
I overall, I really enjoyed the slab building method. It can be a quick and rewarding way of forming structures.
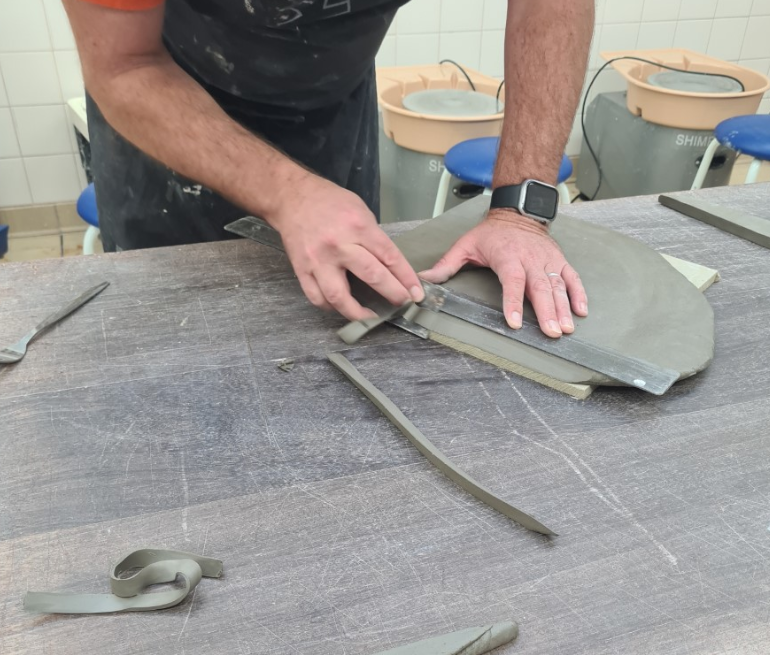
Creating a 45 degree angle
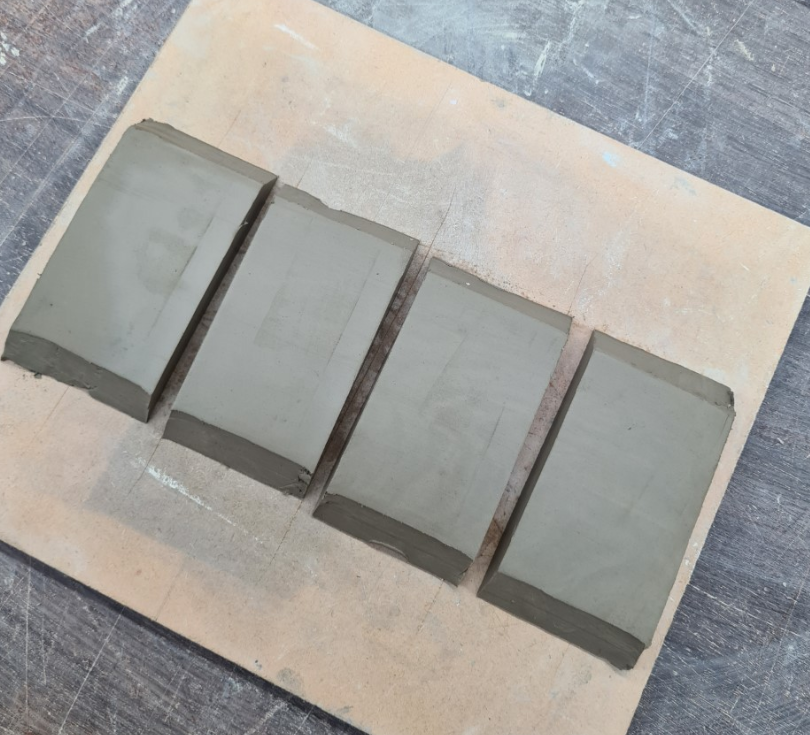
My prepared sides
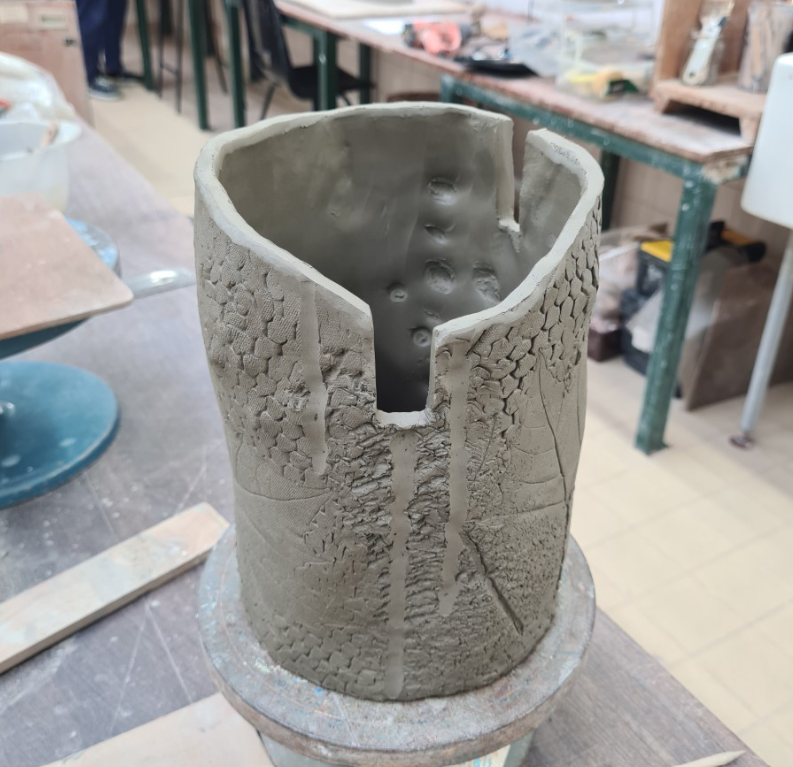
My textured, butt joint, cylinder
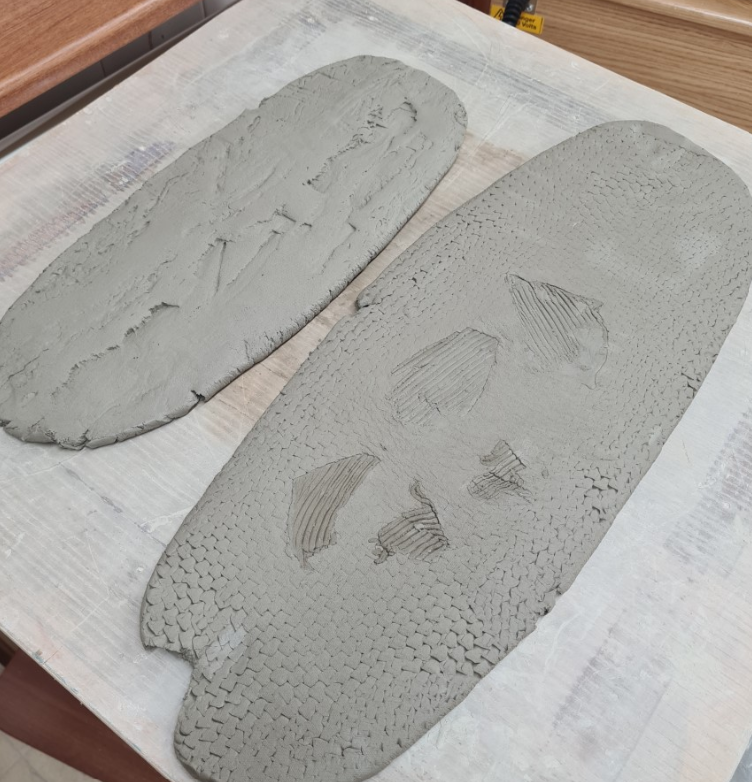
My leather-hard textured slabs
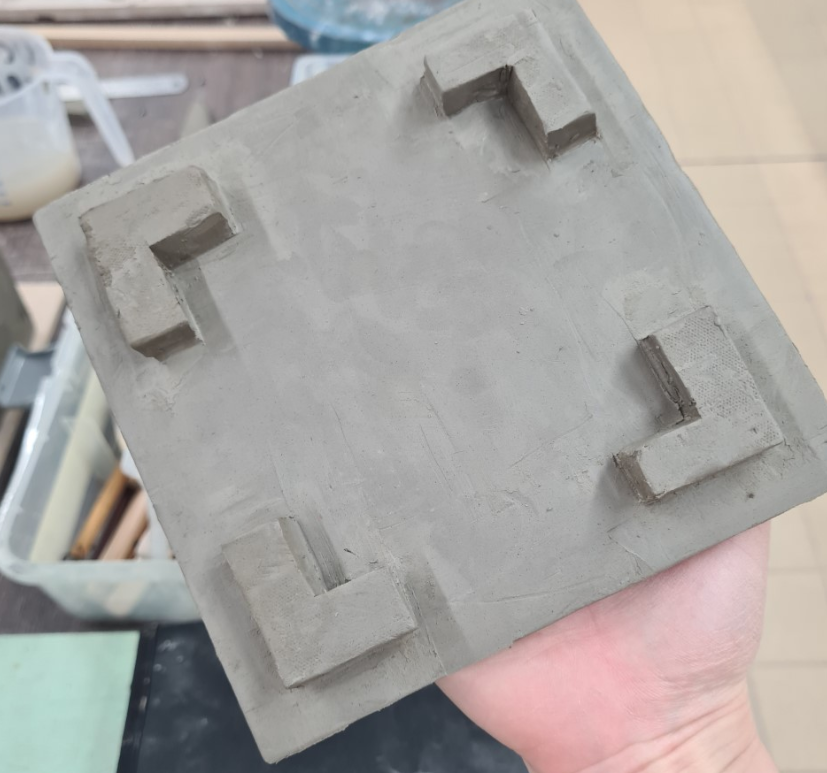
The lid supports to prevent the lid falling off when in use
Joining the sides- using a wooden paddle to help combine the join
Joined
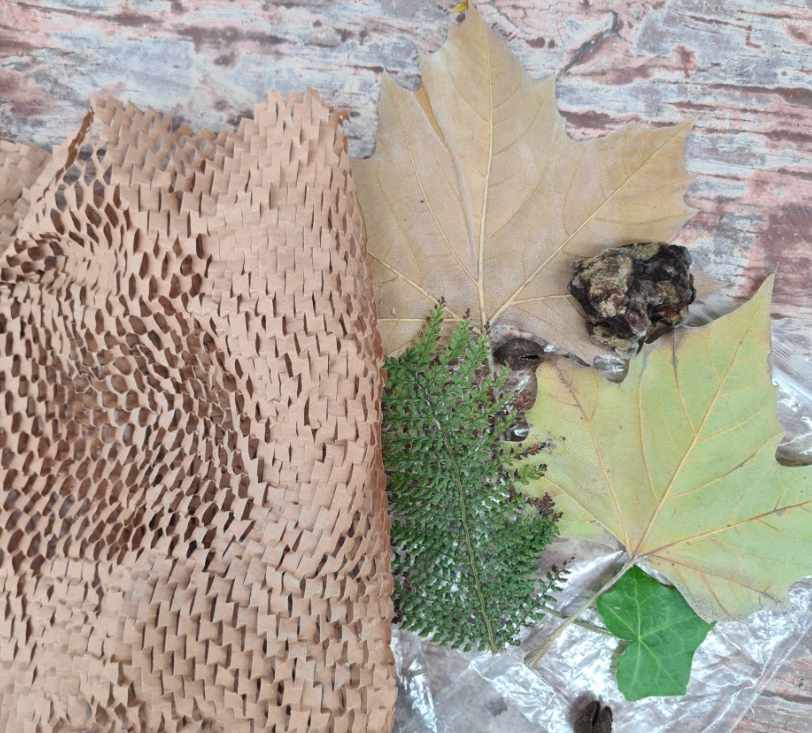
What I used to create the texture

My box using the textured slabs
My cylinder, mitre join box and lidded box